
Welcome to Part #2 of The Start a Money-Making Blog Series! You finished Part I and now have the foundation of your blog. Now you are ready to build a money-making blog (yes, build it! no previous tech experience required.)
In Part I, we covered all of the following topics:
- Getting into the success mindset so you can start a blog that thrives
- Defining the goal of your blog and your value proposition
- Blogging as a business
Missed it? No problem, check it out here.
You’re probably wondering when we are going to actually build your site. Well, you’re in luck, that’s right now.
In Part II of The Start a Money-Making Blog Series, we will select your website host, buy your domain name, set-up WordPress, create key pages for your new blog, and add content to them.
What are you waiting for? Let’s do this!
**Disclosure:The strategies in this post are for educational and informational purposes only – they’ve worked for me and may work for you too! This post also contains affiliate links, which means that I may make a commission, at absolutely no cost to you, if you purchase using my link**
Let’s Build a Money-Making Blog
You’ve been waiting for this step, let’s build your site!
Name your blog
Before we can build your site, you’ll want to give your blog a name. For example, my blog is https://OliviaGabel.com.
You can check domain name availability using this domain name checker.
I suggest choosing a name that will be easy to remember and, ideally, is available on social media. But don’t worry if the name you love is available, but isn’t also available on your social media platforms.
There are plenty of blogs that don’t have the exact social media name, but you’ll want it to be close. For example, my blog is OliviaGabel.com and my social media handle for Pinterest and Instagram is OliviaGabelWrites.
We’ll grab the domain name in the next step so that you own a little slice of the internet!
Choose your Blog Host
Self hosting your blog is vital if you want to build a money-making blog that can actually make money.
While you can get a free blog from places like blogspot, WordPress, etc., you are not allowed to make money your blog on those sites.
For instance, you cannot put up ads, but the provider will likely advertise on your site on their own behalf. And, the hosting provider can remove your site, delete it, and block you from coming back if they find out you went against their policy.
Now, let me clarify, a free blog is not bad. They are fantastic if, for example, you are blogging as a hobby to keep your family updated on your vacation. A free site is only bad if you are trying to build a money-making blog.
While, hosting does cost money, it’s not a lot. I use WordPress on BlueHost. I have heard good things about WordPress on Siteground as well (I imagine they are very similar).
Since I personally use and recommend WordPress on BlueHost, I will be teaching you how to use them in this tutorial.
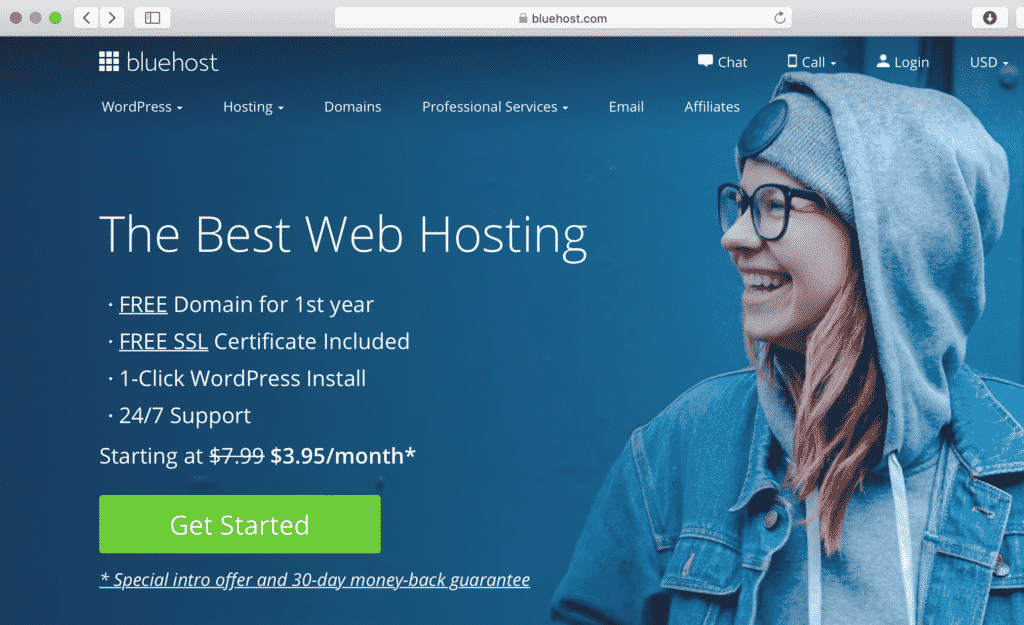
I chose BlueHost for my WordPress site because it has been a recommended WordPress host by WordPress since 2005, and BlueHost gives you all the necessities to get a site with WordPress live in no time.
When you choose BlueHost, you get a free domain name for a year and a free SSL certificate along with your hosting.
Did I mention that you can get a website up and running for $3.95 a month*?
*Disclaimer, in the spirit of full transparency, this is only the price if you pay for 36 months (which I suggest), but if you only want to pay for 12 months, it’s $5.95, which is still a good price!
But I’m Not “Techy”!
I promise you don’t need to be techy to use BlueHost, far from it in fact! Plus, I have step-by-step instructions below to get you up and running in no time.
If that doesn’t ease your mind, no worries, BlueHost has 24/7 support for all of your questions and concerns.
If you have a problem, Bluehost’s support team will answer your question quickly, literally, at any time.
Day or night.
Every. Single. Day.
If you don’t want to talk on the phone, they have a live chat – available 24/7!
I’ve used their live chat and loved it.
One day, I was at my wit’s end, almost in tears because it had been A DAY (it was only 10 am). Of course, I had a question about a security error on my site, so I started a live chat. First, the BlueHost rep was super kind and extremely helpful. Also, she fixed the issue super fast, in less than 10 minutes!
Who doesn’t love that?
Since this is your business and hosting isn’t free, you should take time to do your research and choose a host that you feel comfortable with. Everyone has their reasons why they like who they use, and you should choose a host that resonates with you.
Wait Isn’t WordPress “techy?”
WordPress is a bit more “technical” than some of the other all-in-one providers, but you don’t need to be techy to easily build a WordPress site!
There are tons of WordPress tutorials available on YouTube(one is linked below!) if you want to see step-by-step videos, as well as entire websites dedicated to WordPress.
For instance, I initially started my blog using an all-in-one provider. And yes, it was it very easy to set-up! But after I published only two posts, I had to switch.
Why?
Because customization was super limited, and I honestly don’t know how you could build and scale a business using that provider.
There were tears involved in the switch, as well as some sunk costs (ugh), but I’m living happily ever after over here on WordPress.
Just like anything else, there is a learning curve with WordPress, but it is worth it. Let me help to simplify it for you!
Why You Should use WordPress
I already mentioned WordPress is customizable, but let’s dive deeper into why you should use WordPress when building a money-making blog, regardless of the host.
WordPress is a content management system used to create and manage websites and blogs.
WordPress was initially launched with a singular focus on blogs. It has since grown to be a powerful platform for blogs and business websites, including large e-commerce sites.
Don’t believe me?
Here are just a few companies that use WordPress to run their websites.
- Beyonce (Do I need to keep going?)
- Facebook NewsRoom (Yes, Facebook uses WordPress)
- The Walt Disney Company and so many more…
If these huge companies trust and use WordPress, then why wouldn’t you? WordPress has plug-ins that allow you to do anything you want with your site..
Do you want to start a blog and collect email subscribers? Open an e-commerce site for your blog merch? Create an online gallery for your photography? Document writing a book?
Plug-ins are just like apps on your phone. You download them and get some awesome features that make your site better.
And, just like the app store, there are both free and paid-for plug-ins.
Build a Money-Making Blog Now
When you go to BlueHost, click the Get Started button, and you will be guided through buying your hosting, which includes your domain and SSL.
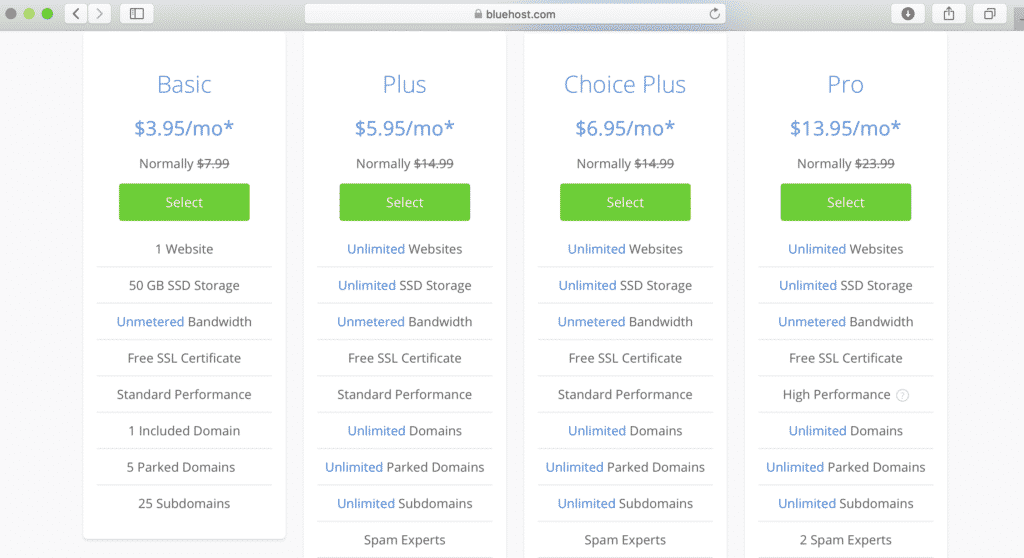
I use the basic package and don’t think you need anything above the Basic plan to get started.
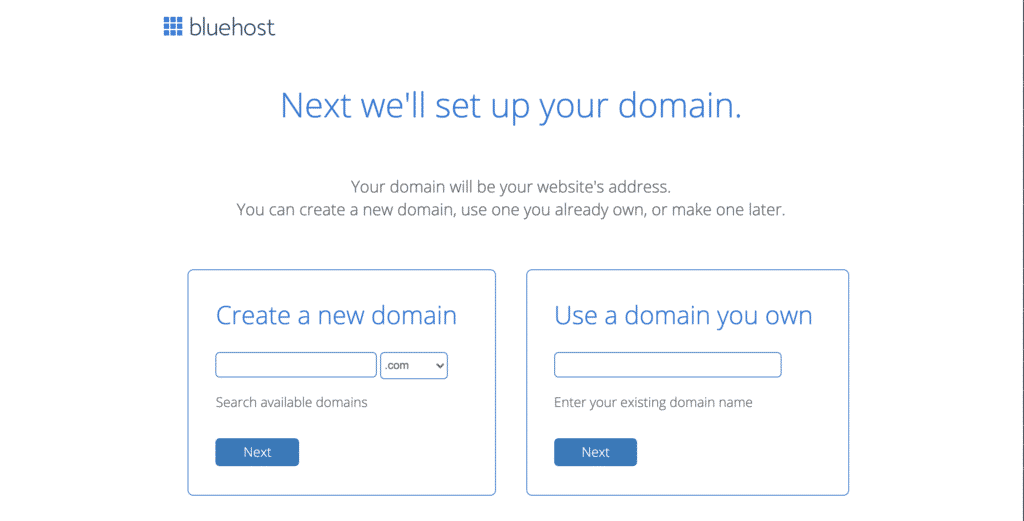
Once you select your plan, you’ll be guided through selecting your domain name. You only need the .com domain. No need to buy .blog, .tv, .co, etc.
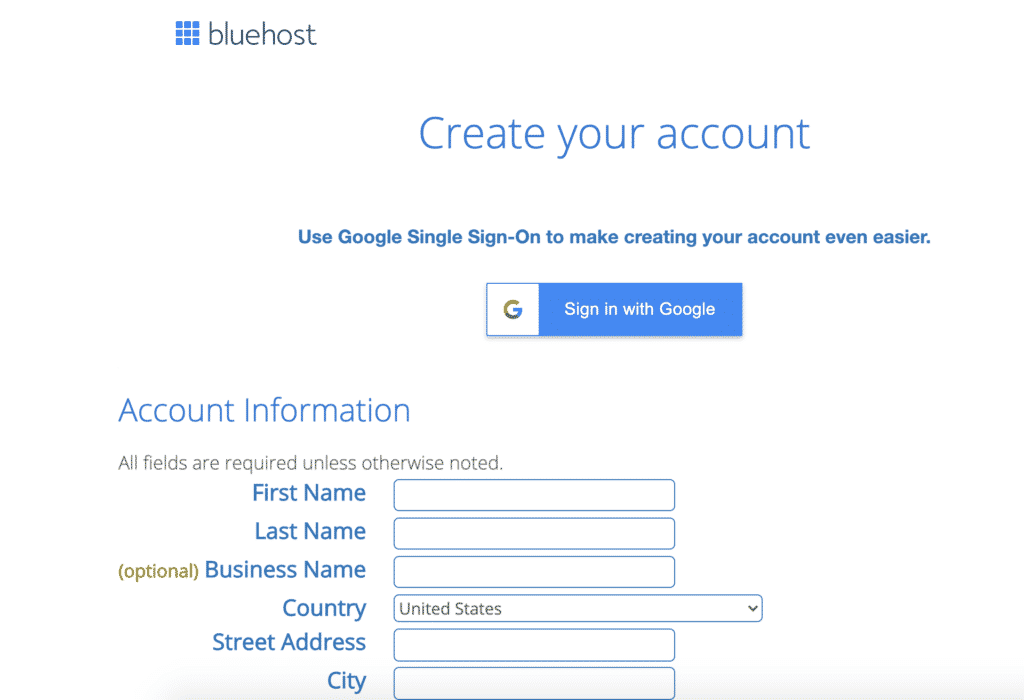
Now it’s time to pay and set-up your account, so you own your site!
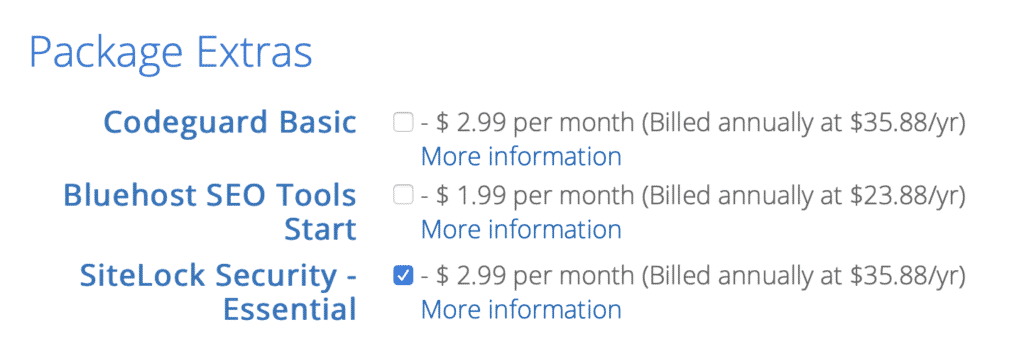
I did buy one additional suggested add-on (pictured below) to my basic package. I felt like it was valuable, but you can skip it and add it later if you don’t want it now!
That was easy, right? Once you complete your registration, YOU OWN A WEBSITE!
Yes! YOU own a little part of the great big internet of things.
How exciting, right?
Set-up Your WordPress Site!
Now that you have a website, it’s time to set-up WordPress so you can start your money-making blog!
When you finish setting up your BlueHost Account, go ahead and log in to see your fantastic website.
A stellar feature of BlueHost is that BlueHost automatically installs WordPress for you, so you don’t have to do anything to get it going.
After the WordPress installation completes, you should see something like this on your BlueHost home page.

Now you can go right into WordPress to get started by clicking the “Log in to WordPress” button.
Watch This Tutorial!
It might feel overwhelming when you log in to WordPress for the first time. When I first started, I wanted follow along instructions so I could easily learn the tool.
Thanks to the internet, I found a video tutorial that was vital in getting my site set-up fast. So, before you feel entirely lost, you should watch the tutorial from YouTube linked below.
It’s step-by-step, and you get to watch it on YouTube. So you can watch, pause, rewind, etc. Also, you do not need to follow his SSL steps at the end because you have SSL with BlueHost.
So that you’re not surprised, it starts with him teaching you how to delete the “starter plug-ins” on your new WordPress site. Which means you should have a website and be logged into WordPress. (If you followed my steps above, you are all set.)
*FYI, I don’t know anything about this guy besides how informational and helpful this tutorial is.
What did you think of that tutorial? Pretty great, right? It helped me get a good grasp of the in’s and out’s of WordPress too.
You Have Your Blog!
YOU DID IT!!! Can you tell that I’m excited for you?
You are on your way, and I hope you’re excited to start writing posts and filling your blog with valuable and engaging content for your community. I know I had tons of ideas when I first started and couldn’t wait to share them!
Ok, you own a blog on the internet, now what?
Add Key Pages to Your New Blog
If you can’t wait a minute longer to start writing your first blog post, then go ahead and start drafting your first money-making post!
Then, whenever you’re ready, it’s time to add a few more key pages to your blog so it has the foundation for success (You may have already added some new pages if you followed the tutorial I linked above).
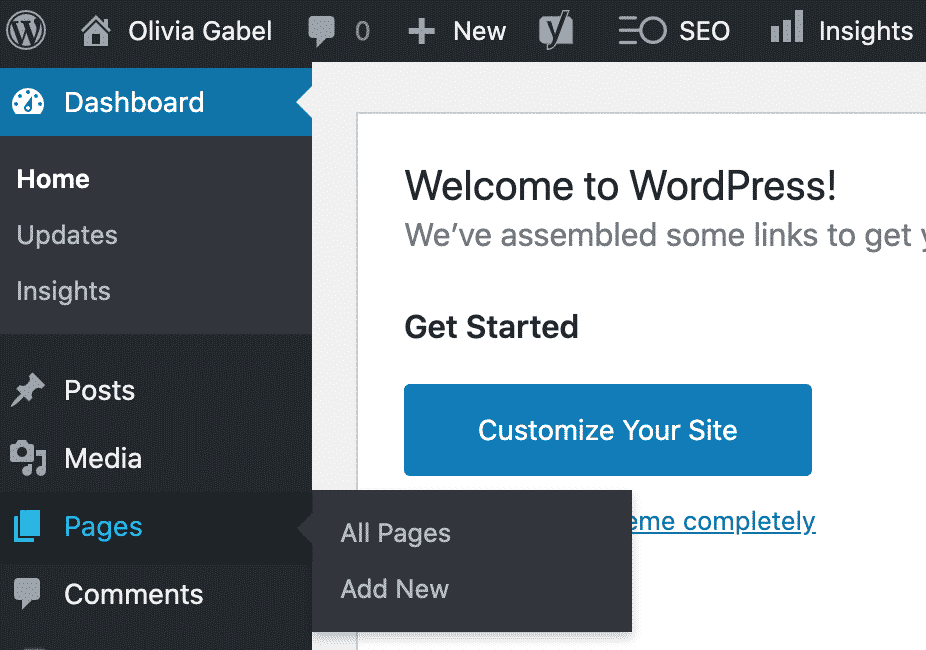
Before we get started, in case you don’t know how, you can add new pages to your site easily from your WordPress dashboard by hovering over “Pages” on the left-hand nav and choosing “Add New.”
Here are the pages you should have on your new blog:
- Home*
- About
- Contact
- Blog
*You don’t need to create this. It gets created by default.
Legal Pages
I also strongly advise you to have legal pages, especially if you collect any user data (e.g., first name and email address). There is a completely free plug-in that you can install to create your legal pages called WP AutoTerms.
It will walk you through creating a basic Privacy Policy as well as Terms and Conditions. Then you can add them to your footer menu. And boom – you have legal pages!
I also added a GDPR plug-in that asks users to accept cookies. It is also 100% free and is called EU Cookie Law.
Add Content to Your Key Pages
Home page
Remember that over-arching goal we created in Start a Money Making Blog Part I? Here’s a hint:
- Your blog niche (what you’re going to write about)
- Your big picture benefit (the problem you’re going to solve)
- Your target audience (who you’re going to serve)
You’ll want your goal or tagline to be right at the top of your new home page!
I also like it when I see a picture of the person behind the blog near the top of the page. It helps to build a connection with your audience right from the get-go.
About Page
An About page is the perfect place to introduce yourself, let your personality shine through, and connect with your audience. Some people don’t think this page is essential, but I always go to the About page when I visit a new blog.
I want to know who is the person behind what I’m reading.
While you should use your About page to tell everyone about yourself and your personal story, you also want to share your value statement and what problem you’re going to solve for anyone visiting your blog here too.
Contact Page
Since you are starting a money-making blog, you want people to be able to connect with you easily! I have personally emailed bloggers and influencers, and it’s so nice to have an easy way to reach out to them. It’s also an excellent way for potential brands to reach out quickly.
On your Contact page, all you need is a short blurb and an email address or contact form.
I do not recommend the standard “[email protected]” format. That’s an easy way for spammers and robots to bombard you with emails. Write it out like “name [at] email [dot] com”
You can add a contact form with a WordPress form plug-in! If you watched the tutorial linked above, you might already have this done.
Blog
I listed this page because you’ll want it in your menu, but you may not have to do much to edit it, depending on your theme*.
As soon as you create your first blog post, you’ll have a blog page that will include a link to the post and a preview of it. And any future posts will automatically show up on this page as you write them!
*Every theme is different, so it is possible you need to create a page and add a blog post widget to it to populate all your posts.
Add Your Key Pages to Your Menu
Now that you have your key pages created, it’s time to add them to your navigation menu on your new blog.
You can do this from your WordPress dashboard* by selecting Appearance and then Menus, OR you can skip ahead to the “Change Navigation menu” in the tutorial I linked at the 58:24 mark (Work smarter, not harder).
Look at you! Taking names and creating a business (and life) you love.
Your blog is ready for the world, now is the time to press the Go Live button!
You did it!
See, it wasn’t too hard to build a money-making blog.
It’s the perfect time to congratulate yourself on your hard work and grab a cup of tea. Oh, don’t forget to tell all your friends about your incredible new blog. You built a blog, you want to build a community to ensure it truly becomes a money-making blog.
Starting a blog is exciting and terrifying all at the same time, but you’ve got this! Remember that consistency is key when you build a money-making blog, and slow and steady wins the race.
Ps: It’s never too soon to put together your content calendar and use Canva to create some more beautiful graphics for your pages!
Wow! You’ve completed Part #2 of the Start a Money-making Blog series!
Are you ready for the third and final part of the Start a Money-making Blog series?
Part #3 is coming next week and is all about taking your blog to next level with branding and site speed.
Don’t miss out, be the first to know by subscribing to my email list!


1 thought on “Part II – Build a Money-Making Blog”
Pingback: Part III - create a color palette for your blog - Olivia Gabel
Comments are closed.